
Spring vs Spring Boot
In this tutorial, we will explain the difference between Spring and Spring boot. We will create an application using only Spring. When we finish pure Spring application, we will explain what is the problem of the pure Spring and how can Spring Boot help us to solve the problems we have! After that, we will discuss when to use Spring Boot and at which occasions it is smart to use only Spring. At the end, we will discuss why all of those things are extremely important!
What is Spring?
Spring offers you a lot of features. One of them is Dependency injection. Instead of creating and managing dependencies ourselves, we leave that task to the Spring. Spring creates and manages our dependencies using a container which is called Application Context. Another features that Spring offers are Aspect Oriented Programming, removing boilerplate code, etc.
While we are speaking about Application Context, have you ever seen that context in action explicitly or that context always perform its actions in the background like some mafia boss?
Creating an application using only Spring, without Spring Boot
Let’s create a new Java application using Gradle as build tool.
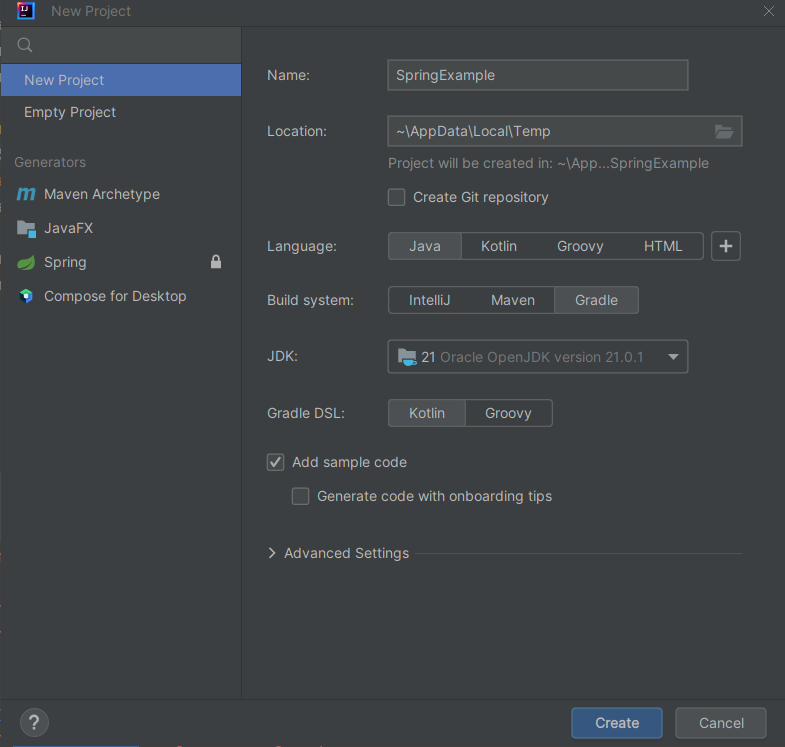
Note that we still do nothing regarding spring, we will add spring dependencies later. We have a pure Java application. Now it is a time to add spring dependencies:
dependencies {
    implementation ("org.springframework:spring-context:6.2.2")
}
Note that we are NOT adding spring boot dependencies but pure spring dependencies! Let’s create application classes using spring annotations:
@Repository
public class PersonRepository {
    public void save() {
        System.out.println("Saving person...");
    }
}

@Component
public class PersonService {
    private PersonRepository personRepository;

    @Autowired
    public PersonService(PersonRepository personRepository) {
        this.personRepository = personRepository;
    }

    public void createPerson() {
        System.out.println("Creating person...");
        personRepository.save();
    }
}
How to use those spring beans in our Java application? We need application context!
Creating spring application context manually
Since we are not using spring boot, we have to create a context manually. Fortunately, that is an easy task:
@ComponentScan
public class SpringApplication {
    public static void main(String[] args) {
        AnnotationConfigApplicationContext context =
                new AnnotationConfigApplicationContext(SpringApplication.class);
        PersonService personService = context.getBean(PersonService.class);
        personService.createPerson();
    }
}
We create AnnotationConfigApplicationContext because we use annotations as a config option. If you try to run main method you will realize that this context works properly and PersonService and PersonRepository are wired and ready inside the ApplicationContext.
Notice that there is no @SpringBootApplication annotation but there is a @ComponentScan annotation. That application instructs spring to scan all packages recursively(starting from the package of the SpringApplication class). That is why @Component and @Repository annotations are scanned properly. We can work even without that component scan but then we would have to create class annotated with @Configuration annotation and define beans inside using a @Bean annotation.
Important note: In Spring boot, application context is created by spring boot, you don’t have to manually create the context.
Introducing the real database
Inside the PersonRepository let’s try to save the Person into the postgres database using Hibernate. First, we need to add the database dependencies:
dependencies {
    implementation("org.springframework.data:spring-data-jpa:3.4.2")
    implementation("org.hibernate:hibernate-core:6.6.6.Final")
    runtimeOnly("org.postgresql:postgresql:42.7.5")
}
Now we need co configure beans so that Spring can integrate properly with the Hibernate using JPA specification:
@Configuration
public class DBConfig {

    @Autowired
    private Environment env;

    @Bean
    public LocalContainerEntityManagerFactoryBean entityManagerFactory() {
        LocalContainerEntityManagerFactoryBean entityManager = new LocalContainerEntityManagerFactoryBean();
        entityManager.setDataSource(this.dataSource());
        entityManager.setPackagesToScan("com.javamentor");
        JpaVendorAdapter vendorAdapter = new HibernateJpaVendorAdapter();
        entityManager.setJpaVendorAdapter(vendorAdapter);
        entityManager.setJpaProperties(this.properties());
        return entityManager;
    }

    @Bean
    public DataSource dataSource() {
        return new DriverManagerDataSource(
                "jdbc:postgresql://localhost:5432/testapp",
                "username",
                "password"
        );
    }

    @Bean
    public EntityManager entityManager(EntityManagerFactory entityManagerFactory) {
        return entityManagerFactory.createEntityManager();
    }

    private Properties properties() {
        Properties properties = new Properties();
        properties.setProperty("hibernate.dialect", "org.hibernate.dialect.PostgreSQLDialect");
        return properties;

    }
}
As you can see, you had to create three beans(LocalContainerEntityManagerFactoryBean, DataSource, and EntityManager). You usually don’t create those beans when you create Spring Boot application. That is the whole point of Spring Boot. Spring Boot configures those beans with some sensible defaults for you! That feature of configuring beans for you is called autoconfiguration. Without spring boot, it would be your responsibility to create all of those beans, wire them together, etc.
Spring MVC example
If you want to create a pure Spring application that needs to expose an API, that would be even harder. Spring Boot automatically create all web and MVC configuration. But also it creates embedded Tomcat Server for you and start your spring boot using that embedded tomcat server. If you want to skip Spring Boot, you would need to start your own web server(Tomcat or something else like Jboss or Netty) and deploy your Spring application to that server.
You can use all of the features that Spring provides even if you don’t use Spring Boot
You can read again this sentence once again: “Spring offers you a lot of features. One of them is Dependency injection.”. It is important to remember that you can use all of the features that Spring provides even if you don’t use Spring Boot. Spring boot helps you with the configuration! Autoconfiguration is the only feature of the Spring Boot.
Spring boot solves a booring config part. Why it is important to know pure spring?
Spring boot works perfectly until you need some custom configuration. But when you need a custom configuration, you need to know how to turn off default config and turn on some custom config. That is where pure Spring knowledge comes into the game. If your task is to deploy application to the external web server then you need to turn off embedded tomcat server and you need to change packaging of your application to the .war instead of .jar. Here is the explanation how to turn off embedded server, change web server, etc. Every junior dev knows how to use Spring Boot application but doing some custom config requires a slighlty more knowledge.
When to use Spring and when to use Spring Boot?
Every single application will need some custom configuration. But if your application is fine with default config most of the time, then it makes sense to use Spring Boot and spring boot will do the default config for you. On the other hand, if your application needs a lot of custom config, or you figure out that you are excluding too much stuff then it is easier to use pure Spring. It is easier to create few beans then to exclude and override bunch of beans that are coming with spring boot.
Conclusion
It is very important to know how to debug spring boot auto config and how to include/exclude certain configurations. If you want to learn more about how spring autoconfiguration works, check my article on the topic.
Further reading
If you want to learn more about Spring here are the good resources:
- Official Spring docs here, here and here. Those are amazing tutorials, best on the internet!
- If you want to learn spring step by step, Spring in Action is a great book!
- You can find more tutorials written by me here